- Flat Image
- Bokeh Effect
- Family Portrait
- Balancing Act
- King Kong Sizes
- Giant Feet
- Gravity Bend
- Merged Subjects
- Cloud Art
Looking to expand your photography skills? Are you always trying to surprise and entertain people? Is your Instagram feed looking a little drab? If you nodded “yes” to any of these questions, consider trying forced perspective photography. It’s a fun, creative photography technique that will test your imagination. From bending gravity to suspending buildings, forced perspective photos offer a stunning uniqueness.
Below, we reveal the secrets behind forced perspective photography. You’ll also find a few mind-blowing poses to help you get started.
What is Forced Perspective Photography?
You’ve probably seen the photos of tourists “holding up” the Leaning Tower of Pisa or “touching” the top of the Eiffel Tower. These are classic examples of forced perspective photography. The photography technique creates an optical illusion. There are four main types of forced perspective photography:
1. Making a subject appear larger
2. Making a subject appear smaller
3. Merging two or more subjects
4. Bending gravity
The idea is to literally force a new perspective onto the viewer. This is achieved by manipulating distance, depth of field, and/or the line of sight.
The Setup for Forced Perspective Photography
Use the following professional picture tips to get your camera – and your mind – in the right setting.
Set a small aperture – In forced perspective photography, there’s a subject in the forefront and a subject in the background. Both points of interest need to be crystal clear. By choosing a small aperture, you maintain the proper depth of field. Shoot for something between f/8 and f/16. For optimal results, set your camera to Aperture Priority. This way you don’t have to worry about shutter speed.
Add a zoom lens – A zoom lens gives you a lot of room to play with perspective. Use it to move toward and away from your subject while staying in one place. That said, don’t go too wide with the angle. A wide-angle can break down the optical illusion.

Use a tilt-shift lens – This lens serves a more specific purpose. It shifts the optics of your camera’s image sensor. As a result, everything appears miniature in size.
Consider the composition – Of the many types of photography, composition is the one thing they all have in common. Composition is critical, especially in forced perspective photography. How you place your subjects directly impacts the perspective. To achieve the best composition, use the rule of thirds. Imagine there are three horizontal lines and three vertical lines. Place your subject at the intersecting points. If available on your camera, turn on gridlines to make this easier.
Enlist help – People and props are crucial to achieving forced perspective photos. Props include the main subject (Eiffel Tower) as well as any objects you add to achieve the illusion. People can also be the subject of your illusion. Or, you might need people to physically hold your props in frame. Don’t be afraid to ask for an extra hand.
Plan accordingly – You know what they say: fail to plan, plan to fail. Forced perspective photography takes time and testing to nail the technique. Do your homework. A thorough plan involves gathering props, laying out the scene, and playing with angles. When you think you’re ready, take a few test shots. If something’s not quite right, make the necessary adjustments and try again.
Forced Perspective Photography: 9 Poses Anyone Can Do
The Leaning Tower of Pisa bit is old hat already. The good news is there are plenty of other forced perspective photo ideas that are just as easy to pull off. These nine clever poses still feel original and they will astonish anyone who sees them.
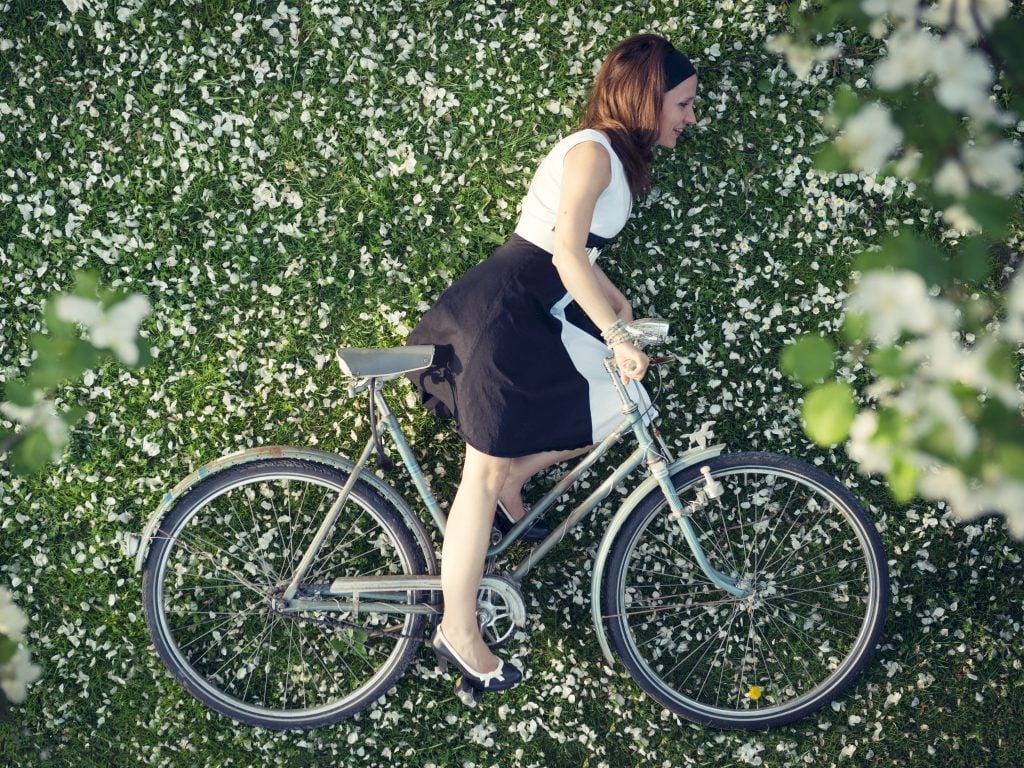
1. Flat image
In a flat image, your subject appears two-dimensional. A common example is the bike lane photo. A person lies on the ground as if they’re riding that white bike lane stencil.
How to do it: The key is shooting directly over your subject. If you go at an angle, the true depth will be revealed. You also want to be sure everything is lined up, especially if you’re attempting the bike lane photo. One leg needs to be hidden.
2. Bokeh effect
Bokeh is a term from your photography dictionary. It refers to the spots of light created from a fast lens at a wide aperture. Use these light bubbles in your forced perspective photography when you want to make magic happen. Maybe you have someone blow bokeh-bubbles or appear as though they’re pouring a cup of bokeh-effect from a pitcher.
How to do it: Hang string lights from a tree, banister, or wherever you can. Position your model or prop a few feet in front of the lights. With the aperture set to f/1.4 to f/2.8, focus your camera on the model or prop. Once the lights appear as blurry bubbles (bokeh), arrange your composition and shoot. You may need to adjust the distance between the lights and model. Or, try a wider aperture until you get the right bokeh effect.
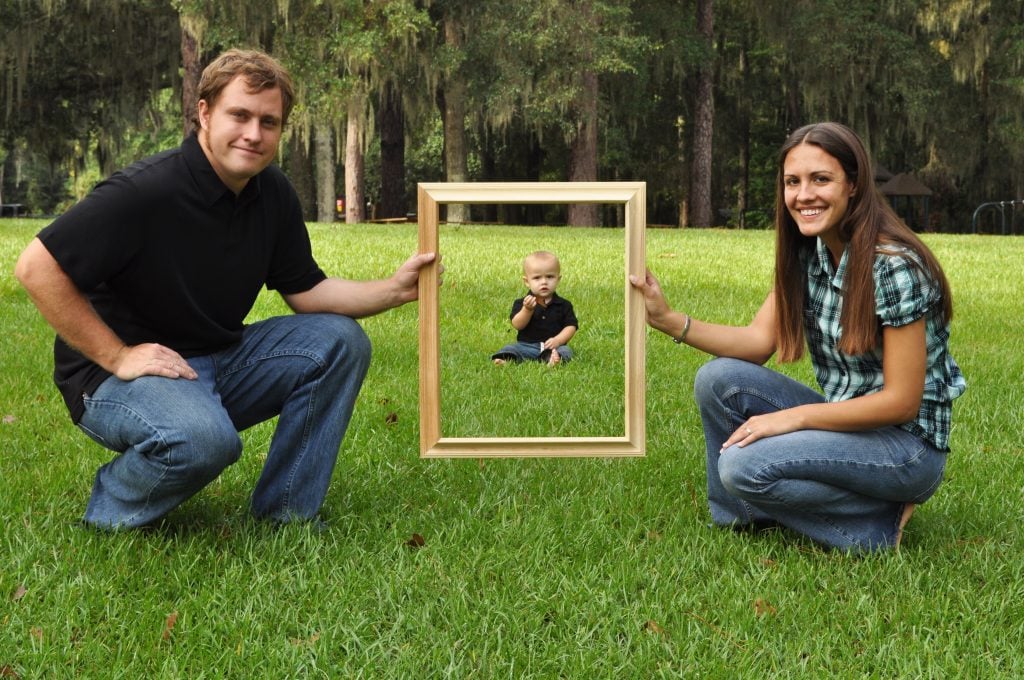
3. Family portrait
Portraits can be so boring. Spice it up by placing the family in an empty picture frame. You’ll have to manipulate the distance and enlist a prop holder or two. But the payoff is priceless.
How to do it: Position the family several yards away from the camera. Have some family members hold the empty picture frame, or use fishing wire to suspend it. Your camera should sit level with the picture frame, so the shot is straight ahead.
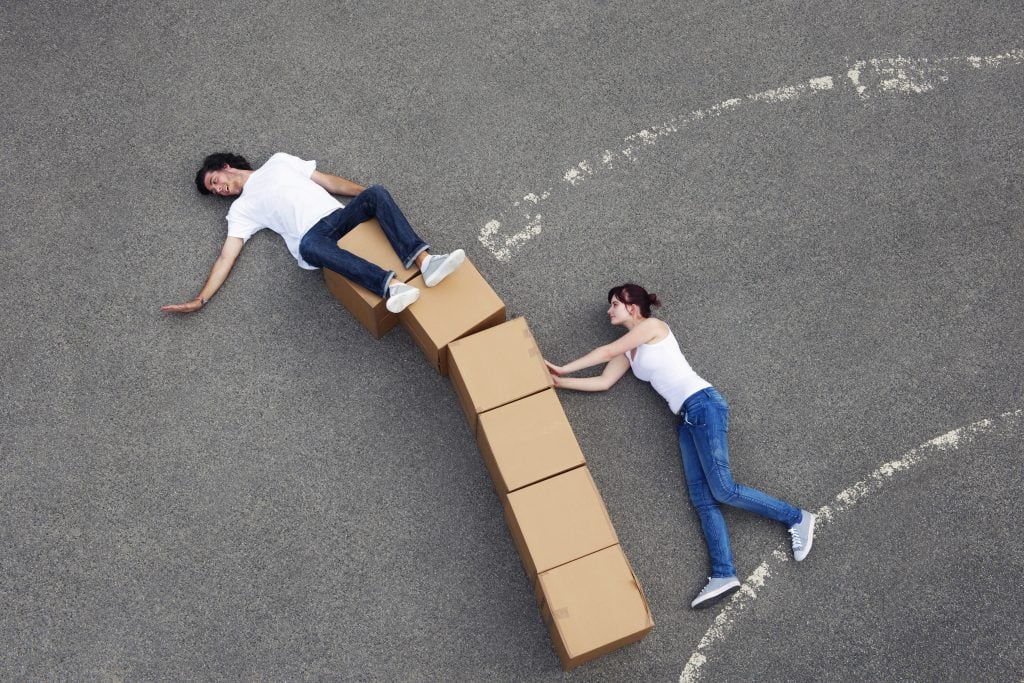
4. Balancing act
Balance is a tricky thing. That’s why it’s the perfect theme for forced perspective photography. The idea is to make it seem as if someone is balancing on an inanimate object. The object should be something no one could possibly balance on in reality.
How to do it: Oftentimes, photographers use bottles. When a person in the background jumps up, it looks like their feet are balancing on top of the bottles. Timing has to be perfect for that to work. A simpler method is to have the person stand in the background. Adjust the angle so their foot is directly on top of the object in the foreground. To emphasize the balancing act, have the person stand on one leg.
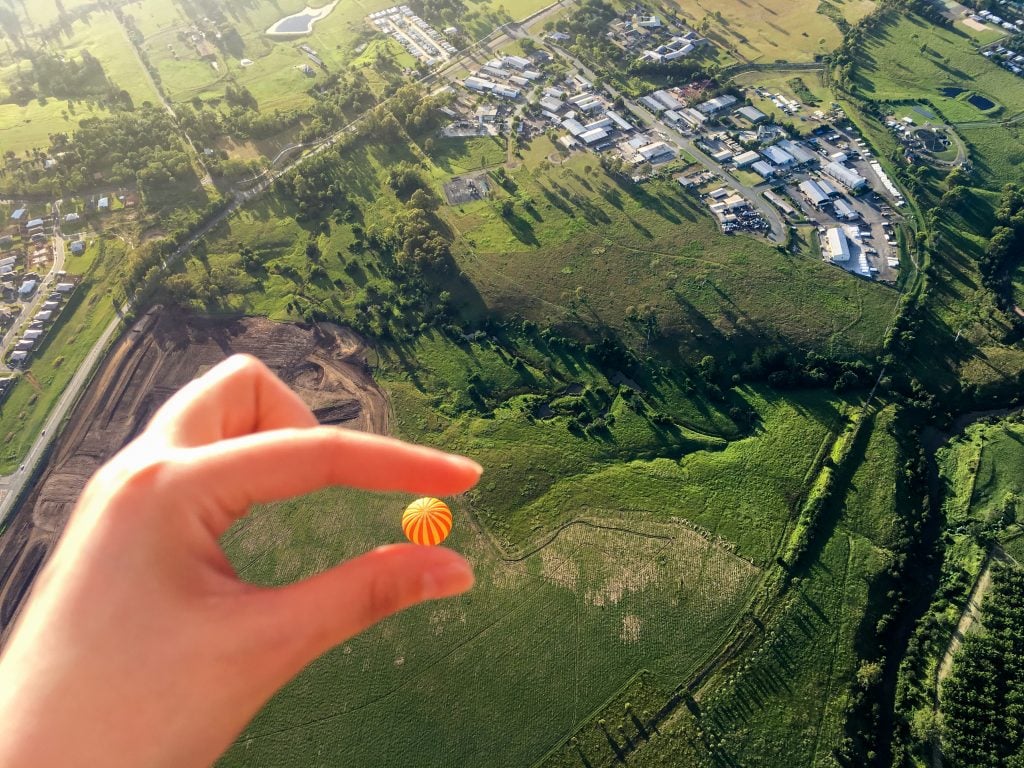
5. King Kong sizes
With this pose, large objects appear tiny and the person (King Kong) appears larger than life. Examples include someone eating a car, stomping a skyscraper, or pinching an air balloon. The options are endless.
How to do it: Set the object being manipulated in the background. The person playing King Kong should be positioned in the foreground. They may even stand behind the camera with just their foot or hand in the frame. Make sure everything is lined up properly. For the greatest impact, keep the background uncluttered. A clear blue sky or grassy landscape works well.
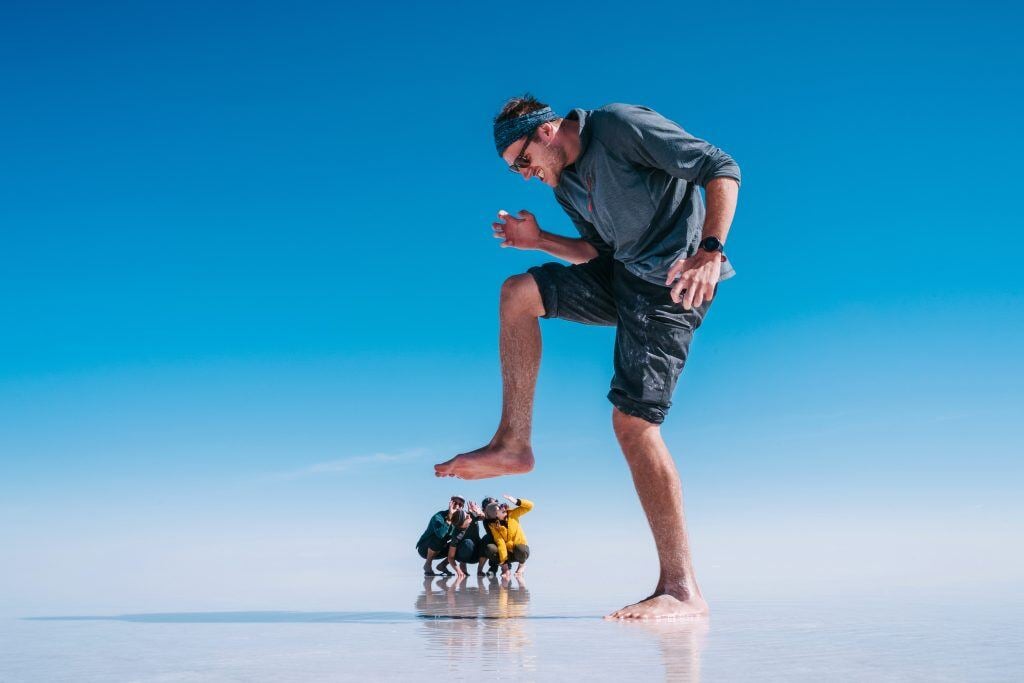
6. Giant feet
Create shock and awe with this deceptively realistic pose. It will look like your feet are larger than life, while your body appears average size in the background.
How to do it: Place a pair of empty shoes on the ground. Sit or stand a foot or two behind them. The camera should be level with your shoes and the lens angled up. In the frame, your feet are hidden behind your shoes. This creates a seamless transition between your legs/ankles and the shoes.
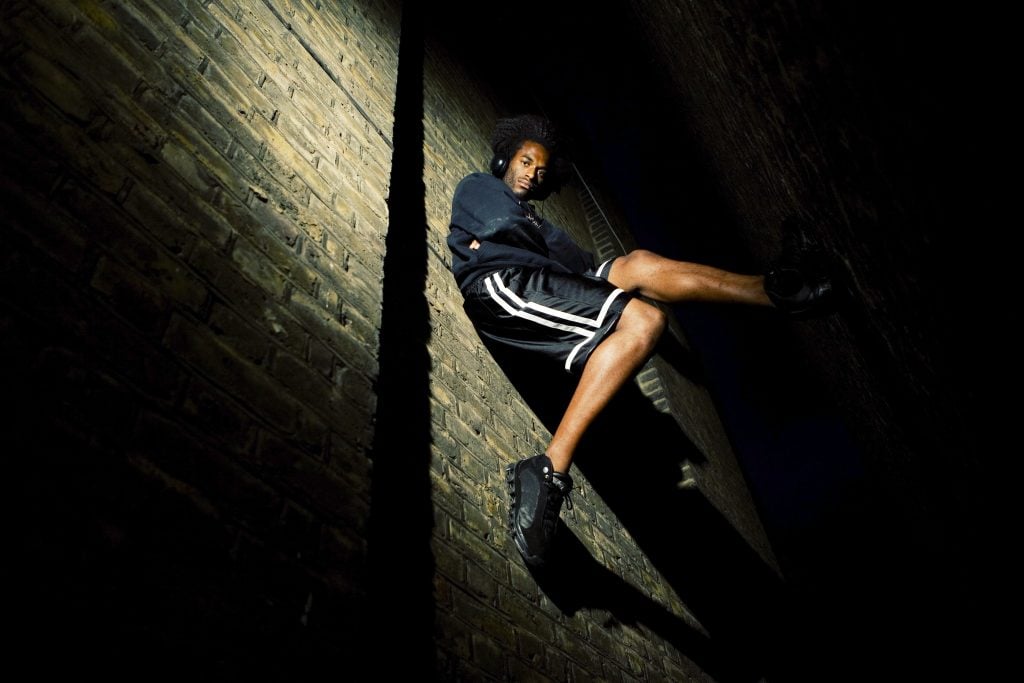
7. Gravity bend
These forced perspective photos turn logic on its head. The subject is usually positioned upside down or appears to be upside down.
How to do it: Locate a safe place to shoot outside, where there’s a building or wall. Ask your model to lie on the ground with their legs sitting flush against the wall. Turn your camera so the wall becomes the ground. Pay special attention to how your model’s hair and clothing are positioned. If they’re hanging in the wrong direction, the illusion is lost.
8. Merged subjects
You can merge two people or two objects. This requires the right positioning or a strategically placed mirror. Another popular idea is to merge a live scene with a sketch image. The sketch seamlessly integrates with the current subject in frame. There are many ideas for merging on Pinterest and Instagram.
How to do it: No matter what you’re merging, the technique is basically the same. Your goal is to match the size of the two subjects and align them to touch. You may need a small aperture and a wide-angle lens to get both subjects in focus.

9. Cloud art
Imagine an aerosol can “spraying” clouds in the sky. That’s cloud art.
How to do it: In the world of forced perspective photography, cloud art is one of the easiest ideas to execute. Grab a can of spray paint or any bottle with a spray nozzle. Kneel on the ground and point your camera up at the sky. The only thing in view should be clouds and sky. Find the end of a trailing cloud. Hold the spray bottle, so the nozzle is right next to that cloud. With a finger on the nozzle and everything lined up, snap the photo!


