For beginner photographers, there are many photography terms to learn. It takes time to master them all. Understanding terms such as aperture and shutter speed help you understand why photos look the way they do. Understanding lighting terms such as exposure and white balance open your eyes to subjects in exciting ways. Composition and shooting terms, such as focus, burst mode, and depth of field broaden your photography horizon.
It can seem overwhelming at first. Ease into your photography journey by learning some photography basics and practicing them with your camera.
Photography Basics
Photography is all about light. To let the camera "see" what you want, you have tools controlling how much light reaches the camera sensor. These are the aperture and shutter speed controls. With too much or too little light, details are lost. When adjusting aperture and shutter speed to achieve the proper exposure, it’s important to account for potential side-effects.
There are many photography terms to learn, and it takes time to master everything.
A great photograph encompasses several elements. When these elements work well together, they bring life and emotion to digital photography. Whether shooting insects, children, mountains, or a cityscape, these elements all play an essential role in creating a photograph worth admiring.
Photography elements of a great photograph include:
- Great use of light
- Great composition (how the subject is presented)
- Sense of timing
- A clear subject
In the end, your favorite photographs will be ones you’ve put the most thought and planning into, even if it takes time to get the “picture perfect” shot. It could be days or weeks before that sunset you’ve envisioned shooting occurs. To get that perfect picture, you’ll need to be ready at precisely the right moment, with the correct aperture and composition.
Types of Photography
A photography style is more than a photography technique or editing style. It’s a combination of every decision made as a photographer. One of the best ways to discover your style is to look for patterns in your likes and dislikes. This includes where you like to travel, taste in food, how you socialize and prefer to spend free time. Consider them all to help you define your style.
As you have more experiences, your unique style develops. Clothing, food, and travel all add to the characteristics of your personal photography style. You may even love weather so much that you take an interest in rain photography.
Here are some photography styles to experiment with when taking photos:
- Portrait photography captures the character of a subject within a photograph. Using the correct camera settings, compositions, angles, lighting, backdrops, and poses, you can capture the subject’s expressions and emotions. It's about creating a portrait that evokes feelings and captivates viewers’ attention.
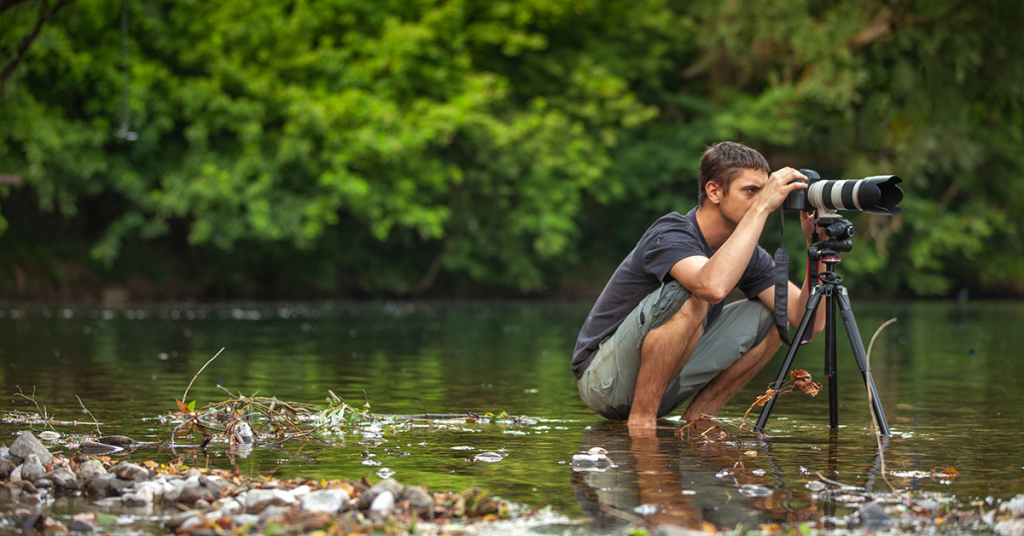
- Landscape photography is the art of capturing images that embody the essence of nature and the outdoors. Incredible landscape photography transports the viewer and gives them a sense of “being there.” As a landscape photographer, the viewer needs to connect with the photographer’s emotions taking the photo.
- Wedding photography is a mixture of many other photographic genres. It incorporates portraiture, family and group photography, documentary, event photography, and close-up images. Wedding photography requires various equipment and preparation, especially when switching from one photography style to another throughout an event.
- Macro photography is a unique form of photography that involves photographing small objects to make them look larger, or even life-sized, in the photo. Macro photography subjects include flowers and small insects, which aren’t typically seen up close with the naked eye. This type of photography brings out details in jewelry and other inanimate objects.
- Fashion photography focuses on clothing and other fashion items. It can show high-end fashion, commercial fashion, streetwear, or fashion-forward looks for more experimental photography subjects.
- Taking pictures of food is a prevalent form of photography. With social media, the rise of food blogs, it’s easier than ever to show the world beautiful food that’s being cooked and eaten.
- Commercial photography involves taking photographs of products or individuals used to sell products or services. This includes anything else that might appear on a business website, literature, or advertisement. It may consist of models or items. Commercial photography applies to advertising, catalog work, or website work.
- Street photography is the art of capturing life and culture candidly. It’s a personal way to photograph, even if the subjects are strangers in a big city. Street photography can occur anywhere. Take photos indoors, such as in coffee shops or unfamiliar places, like country roads or small towns. Street photography is about culture and life.
- If drawn to faraway, exotic places, travel photography takes you to the ends of the earth. It includes many photography elements, such as landscape photography, portrait photography, even street photography. The goal of travel photography is to capture a new environment’s physical and cultural aspects - even underwater photography.
Photography Gear
The ability to shoot high-quality photographs is easier than ever. With each iOS update and new iPhone release, taking pictures with a phone’s digital camera is easier and more advanced. Some people love taking photos with a Digital Single Lens Reflex (DSLR) camera. There are pros and cons to both camera options.
With photography, the center of the universe is the camera bag and its contents. Cameras and lenses are the tools of the trade, but there are additional accessories to assist with your photography endeavors. Here’s an essential list of digital camera and phone camera accessories that benefit any photographer:
- Tripods and mounts: Phone mounts or phone/camera tripods prevent movement or vibration from blurring the shot. They keep the camera on a solid/steady surface instead of in your hands.
- Selfie Stick: This phone camera accessory positions the phone away from you while still giving precise control over the shutter. They’re typically used to take selfies. It is also usable with the higher-resolution rear camera on the phone. A steady hand can allow for excellent, hard-to-get shots.
- Remote shutter release: A remote trigger connects either wired or wirelessly to a digital camera. It allows you to release the shutter remotely without physically touching the camera. Pressing the shutter button on a remote does not move or shake the camera, keeping the lens and shutter steady.
- Snap-on Lenses: A snap-on or clip-on lens is a great way to expand an iPhone’s lens options. These lenses provide an alternative to needing an additional camera and lenses for photos. You can often buy a package of lenses together that include a telephoto lens, macro lens, and fisheye lens. These add-ons provide greater access to creative photography with a camera phone.
- Battery Banks: Camera phones drain a phone’s battery. More so when the flash is frequently used. Having portable batteries is extremely useful. Spare battery banks let you charge your phone between shots, so you’ll always have a photo-ready camera.
- External flash and flash remote: Different lighting modes and light colors exist with external iPhone camera flash options. Flash triggers are great for the power of a flash with full control over the light source’s angle. An external flash trigger syncs with an iPhone via Bluetooth. It is enabled by the iPhone’s Camera app when pressing the shutter release button.
- Flashes can be battery-powered or rechargeable. They can be handheld, wireless, or can attach to an iPhone with a clip or mount.
Camera Settings
Digital camera modes, also known as camera settings, allow photographers to control the camera’s exposure, shutter speed, aperture, and ISO. Exposure settings are crucial when learning photography. The type of exposure settings used will set the tone for the final photograph. Each of these affects exposure differently:
- ISO is adjusted to change the camera’s light sensitivity. It determines how much light is required to expose an image properly. Increasing the ISO makes the digital sensor more sensitive to light and causes it to expose faster. Decreasing the ISO makes the sensor less sensitive and causes it to expose slower.
- Shutter speed is the speed at which the lens shutter opens and closes. The period during which the shutter is open is the time during which the image is exposed. A faster shutter speed receives less exposure, while a slower shutter speed receives more.
- Aperture is the actual hole through which light enters the lens. It is expressed in f-numbers (called “f-stop”) like f/1.4, f/2, f/2.8, etc. They represent the lens opening’s size. By adjusting the aperture’s size, more or less light enters the lens and can reach the film or sensor. A more open aperture allows in more light, while a nearly-closed aperture lets in very little light.
While specific camera modes fully automate camera exposure, other modes let the photographer manually control some or all of the exposure. These are pre-programmed settings that allow you to choose the optimum shutter speed and aperture (f-stop) value for the photograph.
- Automatic mode is when the camera chooses the optimum shutter speed, aperture, ISO, and flash settings. All you need to do is point and shoot. This can be good if you have no idea of what settings to choose or need to shoot quickly.
- Portrait mode finds a subject in the foreground of the frame. It chooses a shallow depth of field to keep the subject in focus. The background is blurred and out of focus. If the camera reads the scene as dark, it will add a fill-in flash. Portrait mode generally works best in well-lit conditions.
- Macro mode is useful for taking photographs of subjects smaller than your hand. Macro mode will not give you super close-up images. You will need a macro lens for this. Macro mode works best in bright conditions and will choose a shallow depth of field to focus on the subject.
- Landscape mode uses a small aperture (high f-stop number) to create a well-focused image from the foreground into the distance. Landscape mode needs a wide lens and works well if the scene is well lit.
On most DSLR camera settings, there will also be the standard letter modes – M (Manual), AV (Aperture-Priority), TV or S (Shutter-Priority), and P (Programmed Auto).
- Manual mode requires the photographer to set every setting.
- Aperture-Priority allows the photographer to set the aperture value. The camera automatically sets the correct shutter speed.
- TV lets the photographer choose the shutter speed first (for example, when shooting sports), and the camera automatically sets the correct aperture.
- Programmed Auto mode is similar to the Auto mode in that the camera determines the shutter and aperture settings, but the photographer can adjust other settings manually.
iPhone cameras have settings similar to a DSLR camera. The camera features available on an iPhone depend on the individual model. Even older models have multiple camera settings to try. Access the settings when opening the Camera app on the iPhone. On newer iPhone models, camera settings are found by toggling the row of options below the camera screen:
- The ultra-wide camera lets users capture a greater field of view and is equivalent to a focal length of 13mm. This lens is useful for shooting landscapes and urban streetscapes, architecture, and building interiors.
- Night mode is excellent for shooting in low-light settings where most cameras would produce blurry or dark photos. It will automatically take a series of pictures at different exposures for a set amount of time and then pull elements from all frames to create one image.
- iPhone Camera Live is a feature that allows photographers to take a short three-second video that captures movement, sound, and still frames. Live Photos are great for capturing photos with movement or group photos. It allows you to ensure that everyone is looking at the camera.
- iPhone Portrait mode is used to take portraits, selfies, and photos of objects that stand out from the background. It gently blurs the background and keeps the subject matter clear.
- Optical zoom allows you to zoom in on an object without a loss of quality. It’s a better way to zoom than using digital zoom (when you spread your pinched fingers outward to zoom in).
- The iPhone camera timer is useful for capturing selfies or group photos where the photographer is included. The timer helps to reduce shake when taking photos in low-light settings.
- Burst photos capture and save multiple images of fast-moving subjects. It allows the photographer to choose the best one later. In Burst mode, your camera captures images at ten frames per second.

Photography Composition
Photography composition highlights the arrangement of elements in a photo. It also showcases the subject within a frame. It ensures a photograph is interesting to the viewer. A good picture takes different parts and combines them into a visually pleasing whole.
Photography composition techniques create a story told within a single frame. There are several composition techniques to learn and practice when looking for the perfect shot:
- Golden Triangle/Golden Rule: The golden triangle, also known as the golden rule, is a composition technique that photographers use to break up a scene. It emphasizes certain areas within the picture. It involves drawing a diagonal line from one corner to the other of the image, and then from that line, two more lines come from the remaining corners to connect them. The shorter lines touch the larger middle line where the most interesting parts of the composition should be.
- The Rule of Thirds is a photography composition technique that can help you take better images. Using a grid of two horizontal and two vertical lines, place your subject slightly off-center to create a better-composed photograph. The gridlines are also useful for making sure images are straight. According to the rule of thirds, the points at which the lines intersect are the ideal places for points of interest.
- White balance is a color composition technique that adjusts a digital photograph to make colors appear more realistic. Whenever a photographic composition or course of light is changed, the white balance must also be adjusted. It’s a way to set a picture to neutral or make sure the white looks white. This is counteracted through post-production software, such as Adobe Lightroom, Photoshop, or similar photo editing programs that provide more control over compositional color.
- The focal length is the distance between the center of the lens and the camera sensor. It determines the angle of view and magnification of the subject. The focal length is measured in millimeters and is used to categorize different types of lenses.
- Wide-angle lens: smaller than 35 mm
- Standard lens: 35 – 70 mm
- Medium telephoto lens: 70 – 135 mm
- Telephoto lens: greater than 135 mm
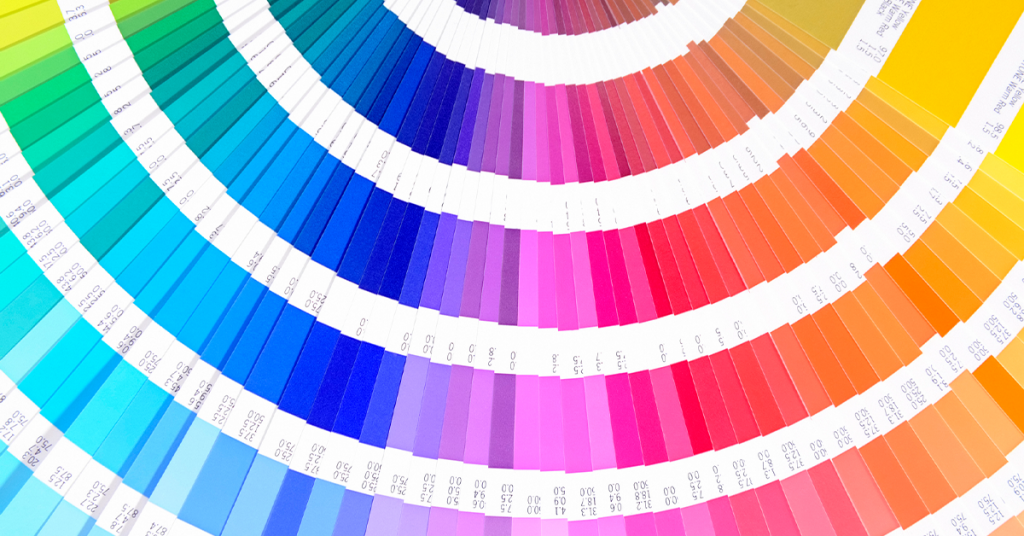
Color Theory in Photography
The perception of different colors is an intensely personal experience. Color theory is essential. How color interacts with the light as the shutter clicks have an impact on the photo.
Color is described in terms of three properties: hue, value, and saturation. Hue describes a color (e.g., red, orange, yellow, green, blue, violet) in its natural state. It’s often categorized into warm (red, orange, yellow) and cool (green, blue, violet). Value describes the relative lightness or darkness of a color.
Every color system consists of primary, secondary, and tertiary colors (hues). A primary color can’t be made by mixing together other hues in its respective system. A secondary color is the result of mixing two primary hues equally. A tertiary color is the result of mixing a primary color with an adjacent secondary hue. Using a color wheel helps keep track of these relationships for additive and subtractive systems.
“True color” is the specification of a pixel’s color on a screen using a 24-bit value, which allows the possibility of up to 16,777,216 possible colors. The human eye can only perceive about 10 million colors. Images rendered in True Color appear to be incredibly realistic. For true colors that can’t be seen as vividly, there are a few things to try and bring those colors to life. This includes mastering lighting, focusing on a single color, or using photo editing software to manipulate colors to your taste.
Color contrast in photography with color schemes is another way to use the color wheel. An analogous color scheme is pleasing to the eye because it utilizes three colors side by side on the color wheel. They’re the dominant color (usually a primary or secondary color), a supporting color (a secondary or tertiary color), and a third color that is either a mix of the two first colors or an accent color that pops.
Photography Lighting
Lighting is one of the most critical elements of any photo. Light in photography refers to how the light source, either natural or artificial, is positioned in relationship to the subject. By paying attention to how light plays off the angles and curves of your subject and which parts of the subject are illuminated and in darkness, you can become a stronger photographer. Whether doing portrait photography, still life, or landscape shots, lighting choices depend on the subject’s features and how it is to be portrayed in photos.
Light sources occur in three different ways: - natural light, studio or artificial light, or a combination of natural and artificial. Lighting techniques will always be different depending on photography goals. For example, bright photography uses more natural light to gain the right kind of brightness in subjects. In contrast, hard light is more severe and emphasizes angles and surfaces that aren’t perfectly flat—for example, waves at a beach or a model with wrinkles. Soft light smoothes over these features.
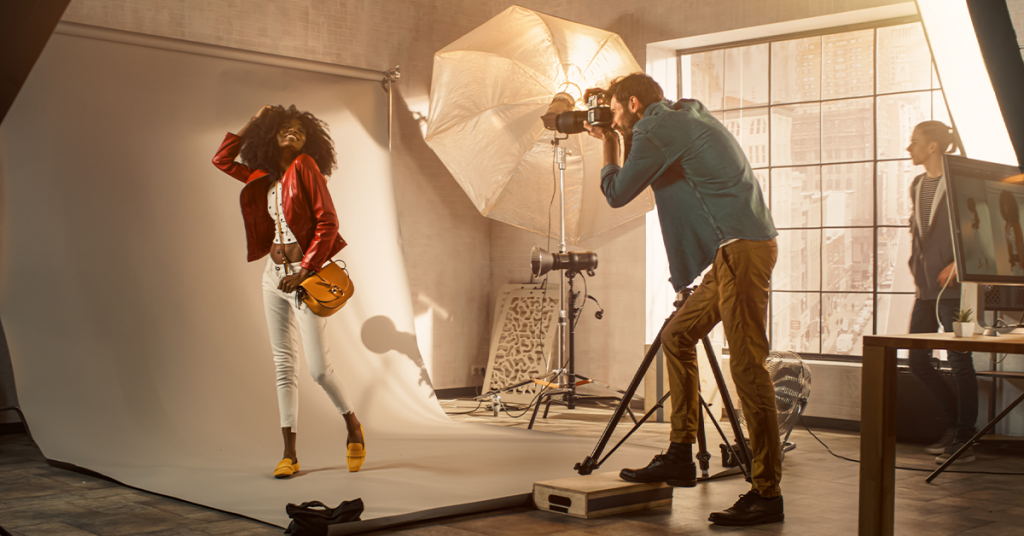
The right photography lighting equipment is key to getting great shots. A lighting kit contains tools that help create shadow, illuminate, and highlight photography subjects in flattering and interesting ways. Different lighting options give you different results. A good lighting kit usually has two types of lighting equipment: a source of lighting and a lighting modifier. A lighting modifier is a dampener like an umbrella or a softbox. Flash and strobe lighting will give fully lit results, while softboxes and umbrellas soften lighting while still illuminating key features.

Photo Editing?
The most important part of capturing photos is the work that happens after photographs are taken. Post-processing and editing can both create effects not captured during the shoot and enhance the captured beautiful features.
In photography, a photo editor refers to one of two things. The first is a tool that edits images. It can also refer to a person who edits images. A photo editor’s duties depend on the company and industry. Photo editors can work at a major brand to prep product photos to list on their site and manipulate lifestyle shots for use throughout the website. Portrait photo editors often work with light-softening and skin correction editing tools.
There are many different types of photo editing techniques and plenty of photo editing tips to help a photographer at any level. Some photo-editing techniques can be done from a digital camera, while others require photo editing software. The way photos are shot and edited can also come from photography trends of the time. As technology advances and the way people live changes, so does the way pictures are captured.
Some photo-editing techniques include:
- Noise reduction: Smoothing the picture out, typically by reducing pixel size.
- White balance: Adjusting the color of the light in the image.
- Contrast: Contrast is the difference between light and dark or colors. Higher contrast makes an image more punchy, while lower contrast flattens color.
- Exposure: Adjusting the brightness of the photo.
- Lens correction: Addressing issues with the camera lens.
- Color adjustments: Changing the color of an item or element in the photo.
- Resizing and cropping: Adjusting the dimensions of the image.
- Background removal: Deleting the background from the image, isolating the subject (this is often used for white background product photography).
More complex, advanced photo editing techniques include:
- Portrait corrections: fix the complexion of people in images.
- Drop and reflection shadow: create or adjust shadows.
- Special effects: this can be anything from animation to adding weather conditions like fog or snow.
- Adjusting text and visuals: add overlays or manipulate what’s already in the photograph.
- Photo stitching: Seamlessly blending two images to make it look like they were shot together.
- Photo masking and Layers: the process of hiding and revealing specified portions of an image.
Photo-editing software is a tool used to manipulate and enhance images. Photo-editing software varies in costs, features, and pros/cons. Popular photo-editing software and programs include Adobe Photoshop, Pixlr, and Canva. Popular photo-editing mobile apps include Snapseed, VSCO, or Afterlight. Some of these apps and programs are free for limited use, while others cost money to access the software.
As you find what you love to photograph and become more comfortable with photography basics, camera modes, and editing tools, organize your work to see how your skills progress over time. This includes creating photo books with Motif to highlight your favorite photo memories, to cherish for years to come.